Halloween, for me, is a time to get crafty. I remember sitting at the kitchen table drawing gruesome monsters and evil witches for decorations to hang in our living room windows. So it was only natural I would continue the tradition with my own children. Instead of drawing pictures we decided to make ghost masks. They look pretty spooky on our shutters. (My kids were all surprised to learn we have shutters. We've lived here a long time, kids. They've always been there.)
Here is what you need:
Plaster of Paris gauze. (I got this off of Amazon.)
Cheesecloth (Amazon)
Vaseline
School Glue
Hair caps (Optional. It was nice not worrying about getting the Plaster of Paris in our hair)
If you are going to put them outside you will also want to use a water proofing spray.

Step 1: Spread Vaseline all over the face of your model. My daughter volunteered to go first. Be sure to get a lot on your eyebrows and any other facial hair you'd like to keep. (I realized too late that this was my opportunity to get rid of the silly mustache my 13 yr old is growing. Seriously. He's 13. It's just wrong.)

Step 2: Cut your Plaster of Paris strips into smaller strips. I didn't measure, but you can see they weren't very wide. I used wider strips for my husband. I'm not sure what he used on me. I had my eyes closed.
(I hope my neck doesn't look this fat in real life. Please don't tell me if it does. My daughter appears to be partly conscious. I assure you she felt no pain. I have no idea where her eyeballs went.)
Step 3: Dip plaster strips in warm water and apply to face.

I knew she still had her eye balls. She's also sporting a lovely beard. The Plaster of Paris dries very quickly. The first thing she complained about was an inability to smile.

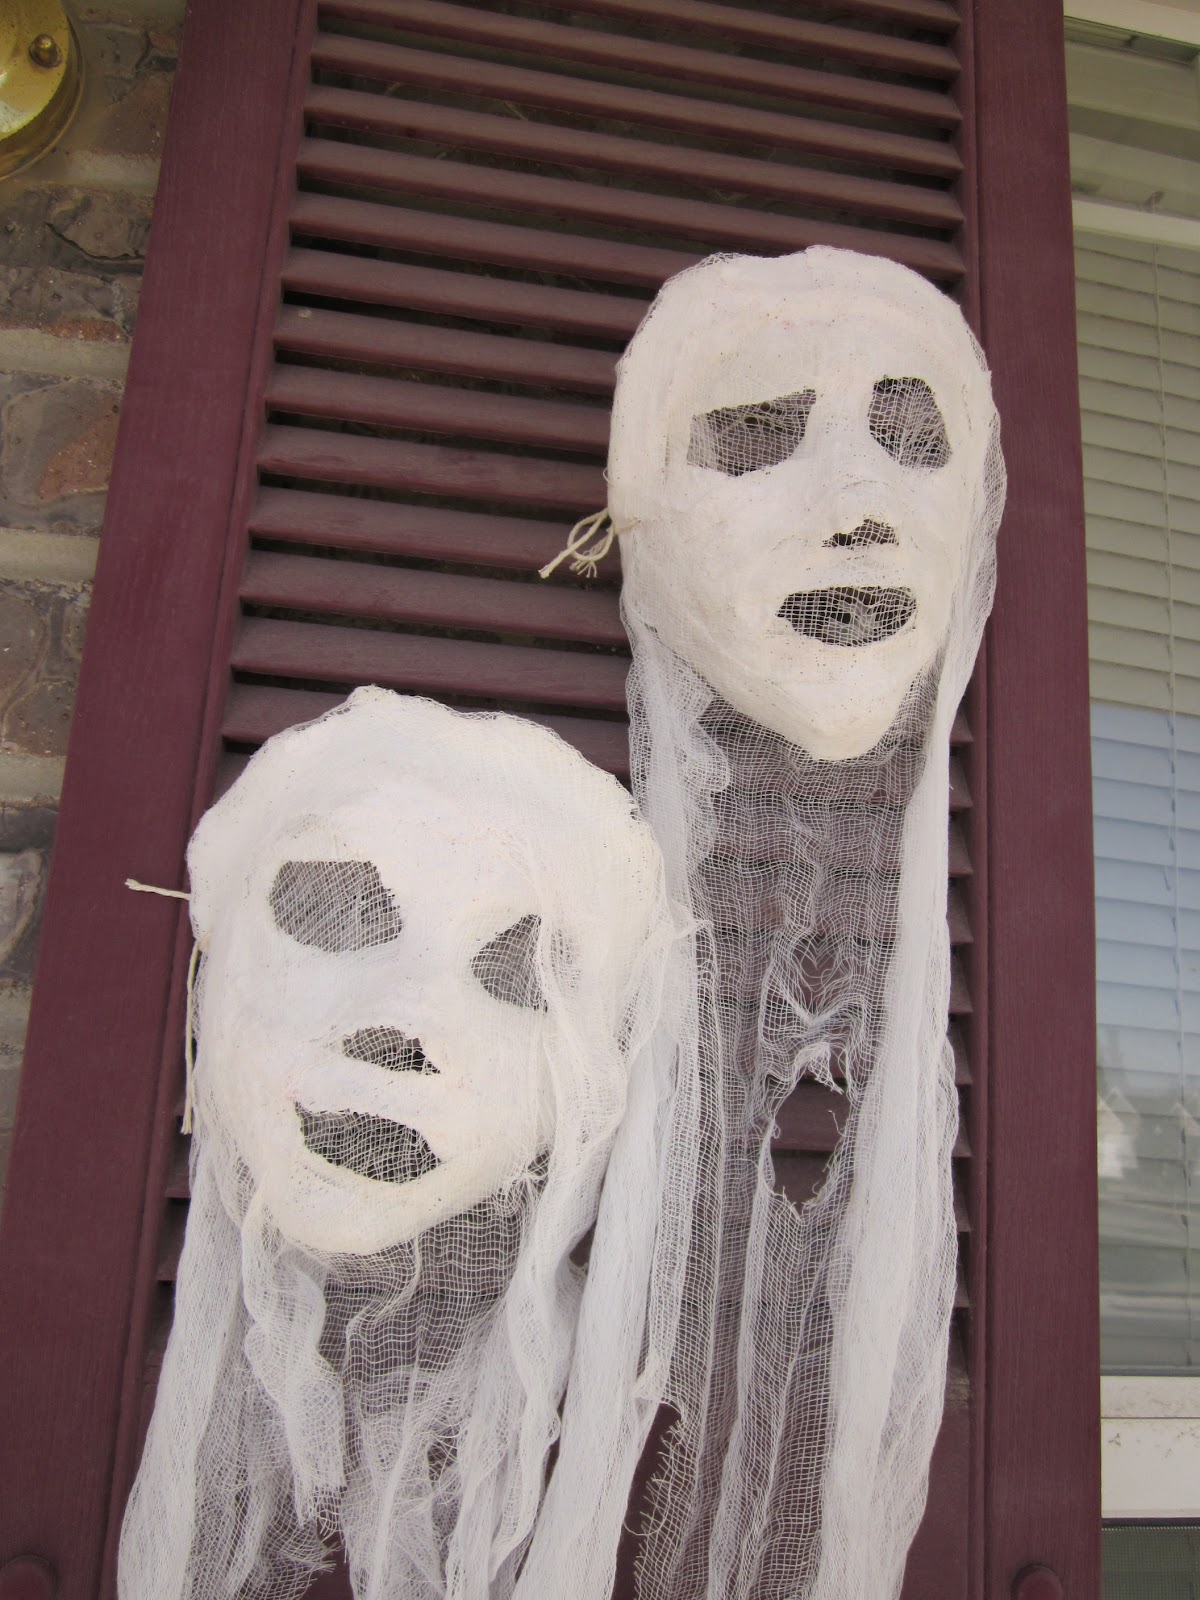
Here she is with the completed mask. I started on the outside, framing the face, then worked my way in. Be sure to get two or three layers down.

Here's my husband.

This is my youngest son. (He just turned 8) I was worried he'd freak out with the mask, but he did pretty well. He enjoyed complaining about being unable to move his face.

My oldest son. He couldn't stop smiling so he stretched his mask a little. The mask even has a little grin.

Me. Note my husband didn't make mine as high as I made everyone else's. Go as high as you can or your mask will have a bitty forehead.

Here they all are after we removed them. (No eyebrows were lost in the making of these masks. No mustaches either, dang it.)

Step 4: Let dry overnight. We could have baked or microwaved them, but we ran out of time and had somewhere to go. I think I prefer the overnight drying anyway. This probably would have been a good time to apply the waterproofing spray. Plaster of Paris is extremely porous so the more layers of waterproofing the better. (These masks can also be painted.)
Step 5: Cut your cheese cloth. Mix the white glue with water (about half and half). Then attach the cheese cloth to the mask with the glue mixture. We used little sponges.


Step 6: Distress the cheese cloth.
After the glue dried overnight, I applied 2 layers of waterproofing spray. Our porch is covered so I'm not too worried about them getting wet.

In case anyone is wondering, I drilled hole in the side with an ice pick to get a string through the masks. You can see the strings in this next picture.